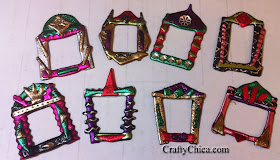
 |
| Melted Plastic Picture Shrines by Kathy Cano-Murillo, copyright 2010. |
I've been making these pendants for a few years now and am finally sharing my tutorial. My inspiration was fired glass jewelry, but I wanted to get the look without a kiln. The result is a cross between clay and glass - made from plastic!
Read on for the tutorial
Supplies:
- Friendly Plastic
- Scissors
- Embossing gun
- Silicone mat
- Aleene's Original Tacky Glue
- Aleene's Paper Glaze
Cut the plastic into small strips, about 2" long. Heat a bit to warm up so it will be sticky and then add the other pieces to make a frame.
Like this!
Now cut up smaller pieces and add them as accents. Keep heating the plastic to stick on new elements. If you want to add a gem, add it into softened plastic, but after it's cooled, remove the gem, add a dot of glue and set the gem. Otherwise the gem will fall out!
Print your pictures to fit the area and glue on the back facing frontwards.
Add the glaze to make them shiny! Add a bail or pin back to make into jewelry.
In case you want to buy one and not make one, I have a few on sale in my etsy shop!
Go be shiny,
Kathy :-)
Check out my new novel! MISS SCARLET'S SCHOOL OF PATTERNLESS SEWING


These are great! Thank you for sharing your technique!
ReplyDelete